Self-Hosted Application – Integration into Insights Hub
It is possible to integrate the applications hosted outside of Insights Hub. They are called self-hosted applications, as Insights Hub does not manage and operate the infrastructure that powers them. This section illustrates how to develop such an application and how to integrate it into Insights Hub.
Requirements for Self-Hosted Applications
The following requirements apply for integrating your self-hosted application into Insights Hub:
- Your self-hosted application is reachable via DNS and a valid SSL certificate (self-signed certificates are not allowed).
- Your self-hosted application exposes one health endpoint for Insights Hub's internal monitoring.
- Your self-hosted application uses the Insights Hub Identity Management.
- Your self-hosted application is registered in the Gateway.
Preparing the Application
Prerequisites
- You need access to some infrastructure, e.g. server, which is accessible from the internet
- The hosted application must be available via a DNS name and must be secured with SSL (no self-signed certificates)
Deploying the application
- Connect to the infrastructure on which you want to deploy the application.
-
Make sure that your application is available in the infrastructure. Alternatively, copy the following python example into a suitable place:
Python Example
from flask import Flask, request, jsonify import requests import os from datetime import datetime # Read MDSP environment from environment variables ENV = os.getenv("MDSP-ENV", 'eu1') ASSET_PATH = 'https://gateway.{0}.mindsphere.io/api/assetmanagement/v3/assets'.format(ENV) app = Flask(__name__) # Get port from environment variable or use default port = int(os.getenv("PORT", 80)) @app.route('/') def hello_world(): auth_header = request.headers.get('Authorization', None) if auth_header is not None: # Add headers for authorization (use token from requesting user) and the accept type headers = {'Authorization': auth_header, 'Accept': 'application/hal+json'} try: r = requests.get(ASSET_PATH, headers=headers) resp = r.json() # response as json except Exception as err: resp = str(err) try: return jsonify(resp) # return json response from MindSphere API except Exception as err: print('Failed to jsonify', err) else: return 'Retrieved no authorization header' @app.route('/health') def health_check(): # do some checks and then return the result health = { 'healthStatus': 'green', 'time': datetime.utcnow().replace(tzinfo=datetime.timezone.utc).isoformat() } return jsonify(health) if __name__ == '__main__': app.run(host='0.0.0.0', port=port) -
Start the application using the following command:
python <filename>.py -
Ensure that your application is reachable from the internet, e.g. by configuring security policies.
-
Try calling the application via
https:\\{dnsname}\. You should receive the following error:Retrieved no authorization header
In this example, the application expects that the Insights Hub authorization header is present in the request. The authorization header is used for identifying the accessing user and related tenant from which to retrieve data. Next, the application has to be configured in the Developer Cockpit to integrate with Insights Hub's Identity and Access Management Roles & Scopes.
Productive Usage
The process described above is not suitable for production. We advise to use a suitable concept to host and run your application.
Configuring your Self-Hosted Application in the Developer Cockpit
Prerequisites
- Your self-hosted application has been successfully deployed as described in the previous chapter.
- Your self-hosted application is running and reachable from the internet.
Creating the Application
- Open the "Dashboard" tab of the Developer Cockpit.
- Click on "Create new application".
- Fill in the mandatory inputs (e.g.,
Name,Display Name,VersionandApp Icon). - Check the "Self Hosted Application" checkbox.
- Add at least one component with an external URL, e.g.
https://myapplication-123456789.eu-west-1.elb.amazonaws.com. - Click on "Save" to create the application.

Info
Adhere to the Restrictions mentioned in the Gateway when making requests to either own registered applications or Industrial IoT APIs.
Registering the Application
- Navigate to the "Roles & Scopes" tab.
- Select your application.
- Add at least one default scope, e.g.
myselfhosted.default. - Add the core role
mdsp:core:assetmanagement:standarduser(required for the python example). - Navigate back to the Application Details screen for your application.
- Click on the "Register" button for your application.
Testing the Application
- Open the "Settings" application.
- Search and select your user name and click on "Edit role assignment".
- Search for the role
mdsp:<tenant>:<application>.<role>(in this examplemdsp:<tenant>:myselfhosted.user). - Log out and log in again.
Your application icon is now shown on the Launchpad and opens the application. If you are using the example application, the application shows a list of all assets available in your tenant.
Firewall Settings
Insights Hub applications running on Cloud Foundry access the internet via a NAT gateway. If you want to enable these applications to access your application server, your inbound firewall must allow the NAT gateway's IP addresses:
-
In region Europe 1:
35.156.223.10 18.194.162.141 18.194.195.179 -
In region China 1:
101.132.123.180
106.15.159.73
47.102.201.47
47.102.210.119
Submitting your Self-Hosted Application to the Industrial IoT Store
Prerequisites
- Your application is configured and registered in the Developer Cockpit.
- The Insights Hub Bar is integrated into your application.
- You have prepared a screenshot of your application showing the top-level site including the Insights Hub Bar.
- You have prepared a description of the application.
- You have the role
mdsp:core:DeveloperAdmin.
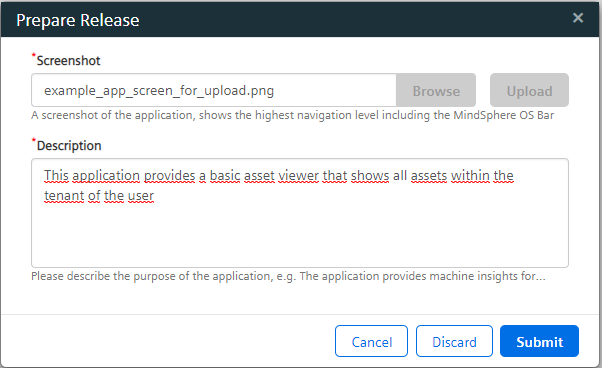
Prepare Release
- Navigate to the details view of your application.
- Click on "Prepare release".
- Select a screenshot of your application and then click on "Upload".
- Fill in the application description.
- Click on "Submit".
Approve Upload
- Navigate to the details view of your application.
- Click on "Approve Upload".
- Enter an "Alternate Email" address of your substitute.
- Read and accept the IMPORTANT NOTICE information.
- Click on "Approve".
Your application has been successfully submitted to the application repository. You and your alternate contact are notified once the application is ready for assignment or if it does not fulfill the MindSphere requirements.
Except where otherwise noted, content on this site is licensed under the Development License Agreement.