Using Integrated Data Lake (IDL) Data Sources in Dashboard Designer Add On
IDL data sources are accessible in the data sources drop-down list when you create a new panel and select a visualization, or when you create or edit a query. This allows you to:
- Bring CSV and Parquet data in from IDL
- Visualize multiple IDL queries in one widget
- Visualize IoT and IDL data in one widget
IDL Data Source Limitations
- Annotations are not supported for IDL data sources.
- A maximum of 4,000 records is supported in IDL queries.
- Aggregated data is not currently supported in queries, but is planned for a future release. The exception is the Gague widget, which auto-aggregates the data returned by a query.
- A query time range of up to five years is supported.
- Access controls may not extend to all data in IDL files and folders. For example, if two IDL files with access restrictions reside within an IDL folder that is unrestricted, and a user queries the unrestricted folder, all the files are returned, irrespective of restrictions on the IDL files or the user who creates the query.
- IDL data sources do not support annotations.
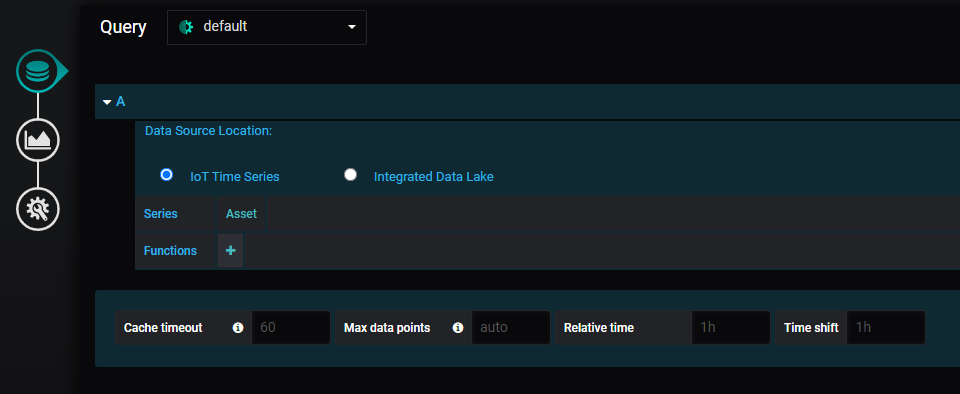
Example of the IDL Data Source Selection
How to Write IDL Data to Your Dashboard
Follow these steps to read your data from its IDL location and write it to your dashboard:
- Hover over the + button on the side panel, and click "Dashboard". A blank dashboard with an empty panel displays.
- Click "Add Query". The Panel edit page displays.
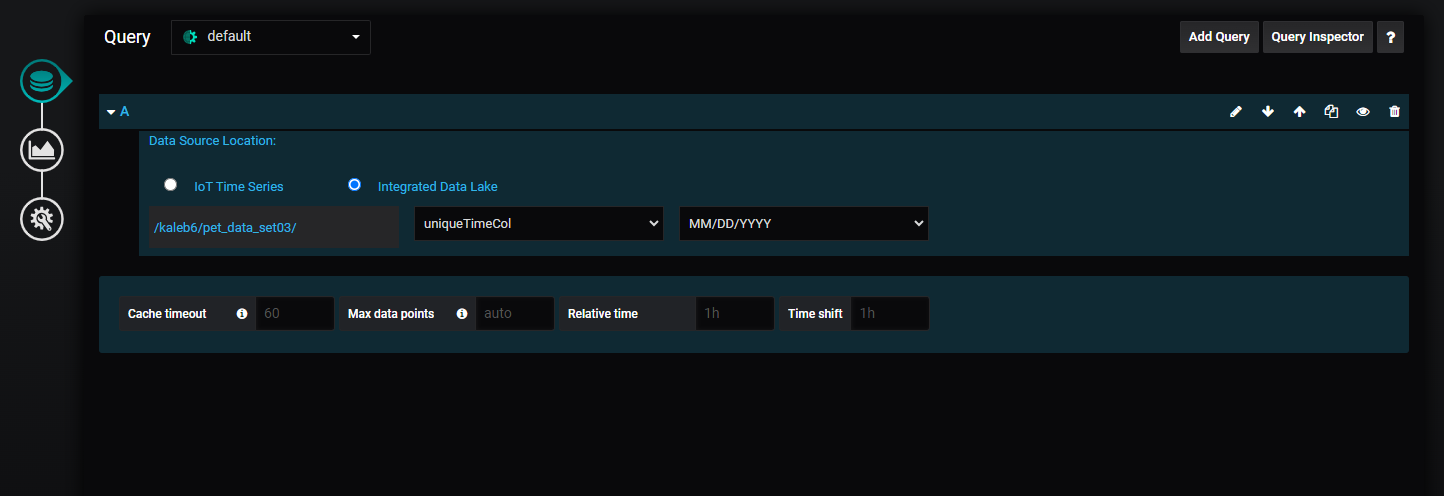
- Select the Integrated Data Lake radio button. The IDL pop-up window displays.
- Select your data's file type (CSV or Parquet).
- Click the folder containing your data or use the search bar to locate it. Folder contents display to the right.
- Select check boxes for each field to include in the query.
- Click "Add Data Source". The path to your data source displays in the Data Source Location section.
Here is an image of the Data Source Loation section:
How to Select the Date Options for an IDL Data Source
Follow these steps to format the date fields:
- Select a value from the time column drop-down list.
- Select a date-time format. Data renders at the top of the screen according to your entries.
- Continue to add additional queries by clicking the Add Query button and repeating the steps above.
Last update: January 22, 2024